

Stokeshire Garage – Left Wall Sink & Cabinet Design Brief
1. Project Overview
Replace the existing small sink and base cabinets on the left garage wall with a deeper stainless puppy-wash sink and new base cabinets that maximize storage while fitting within the measured wall span. Space is used for bathing puppies, washing bowls, and general utility cleaning, so durability and cleanability are more important than aesthetics.
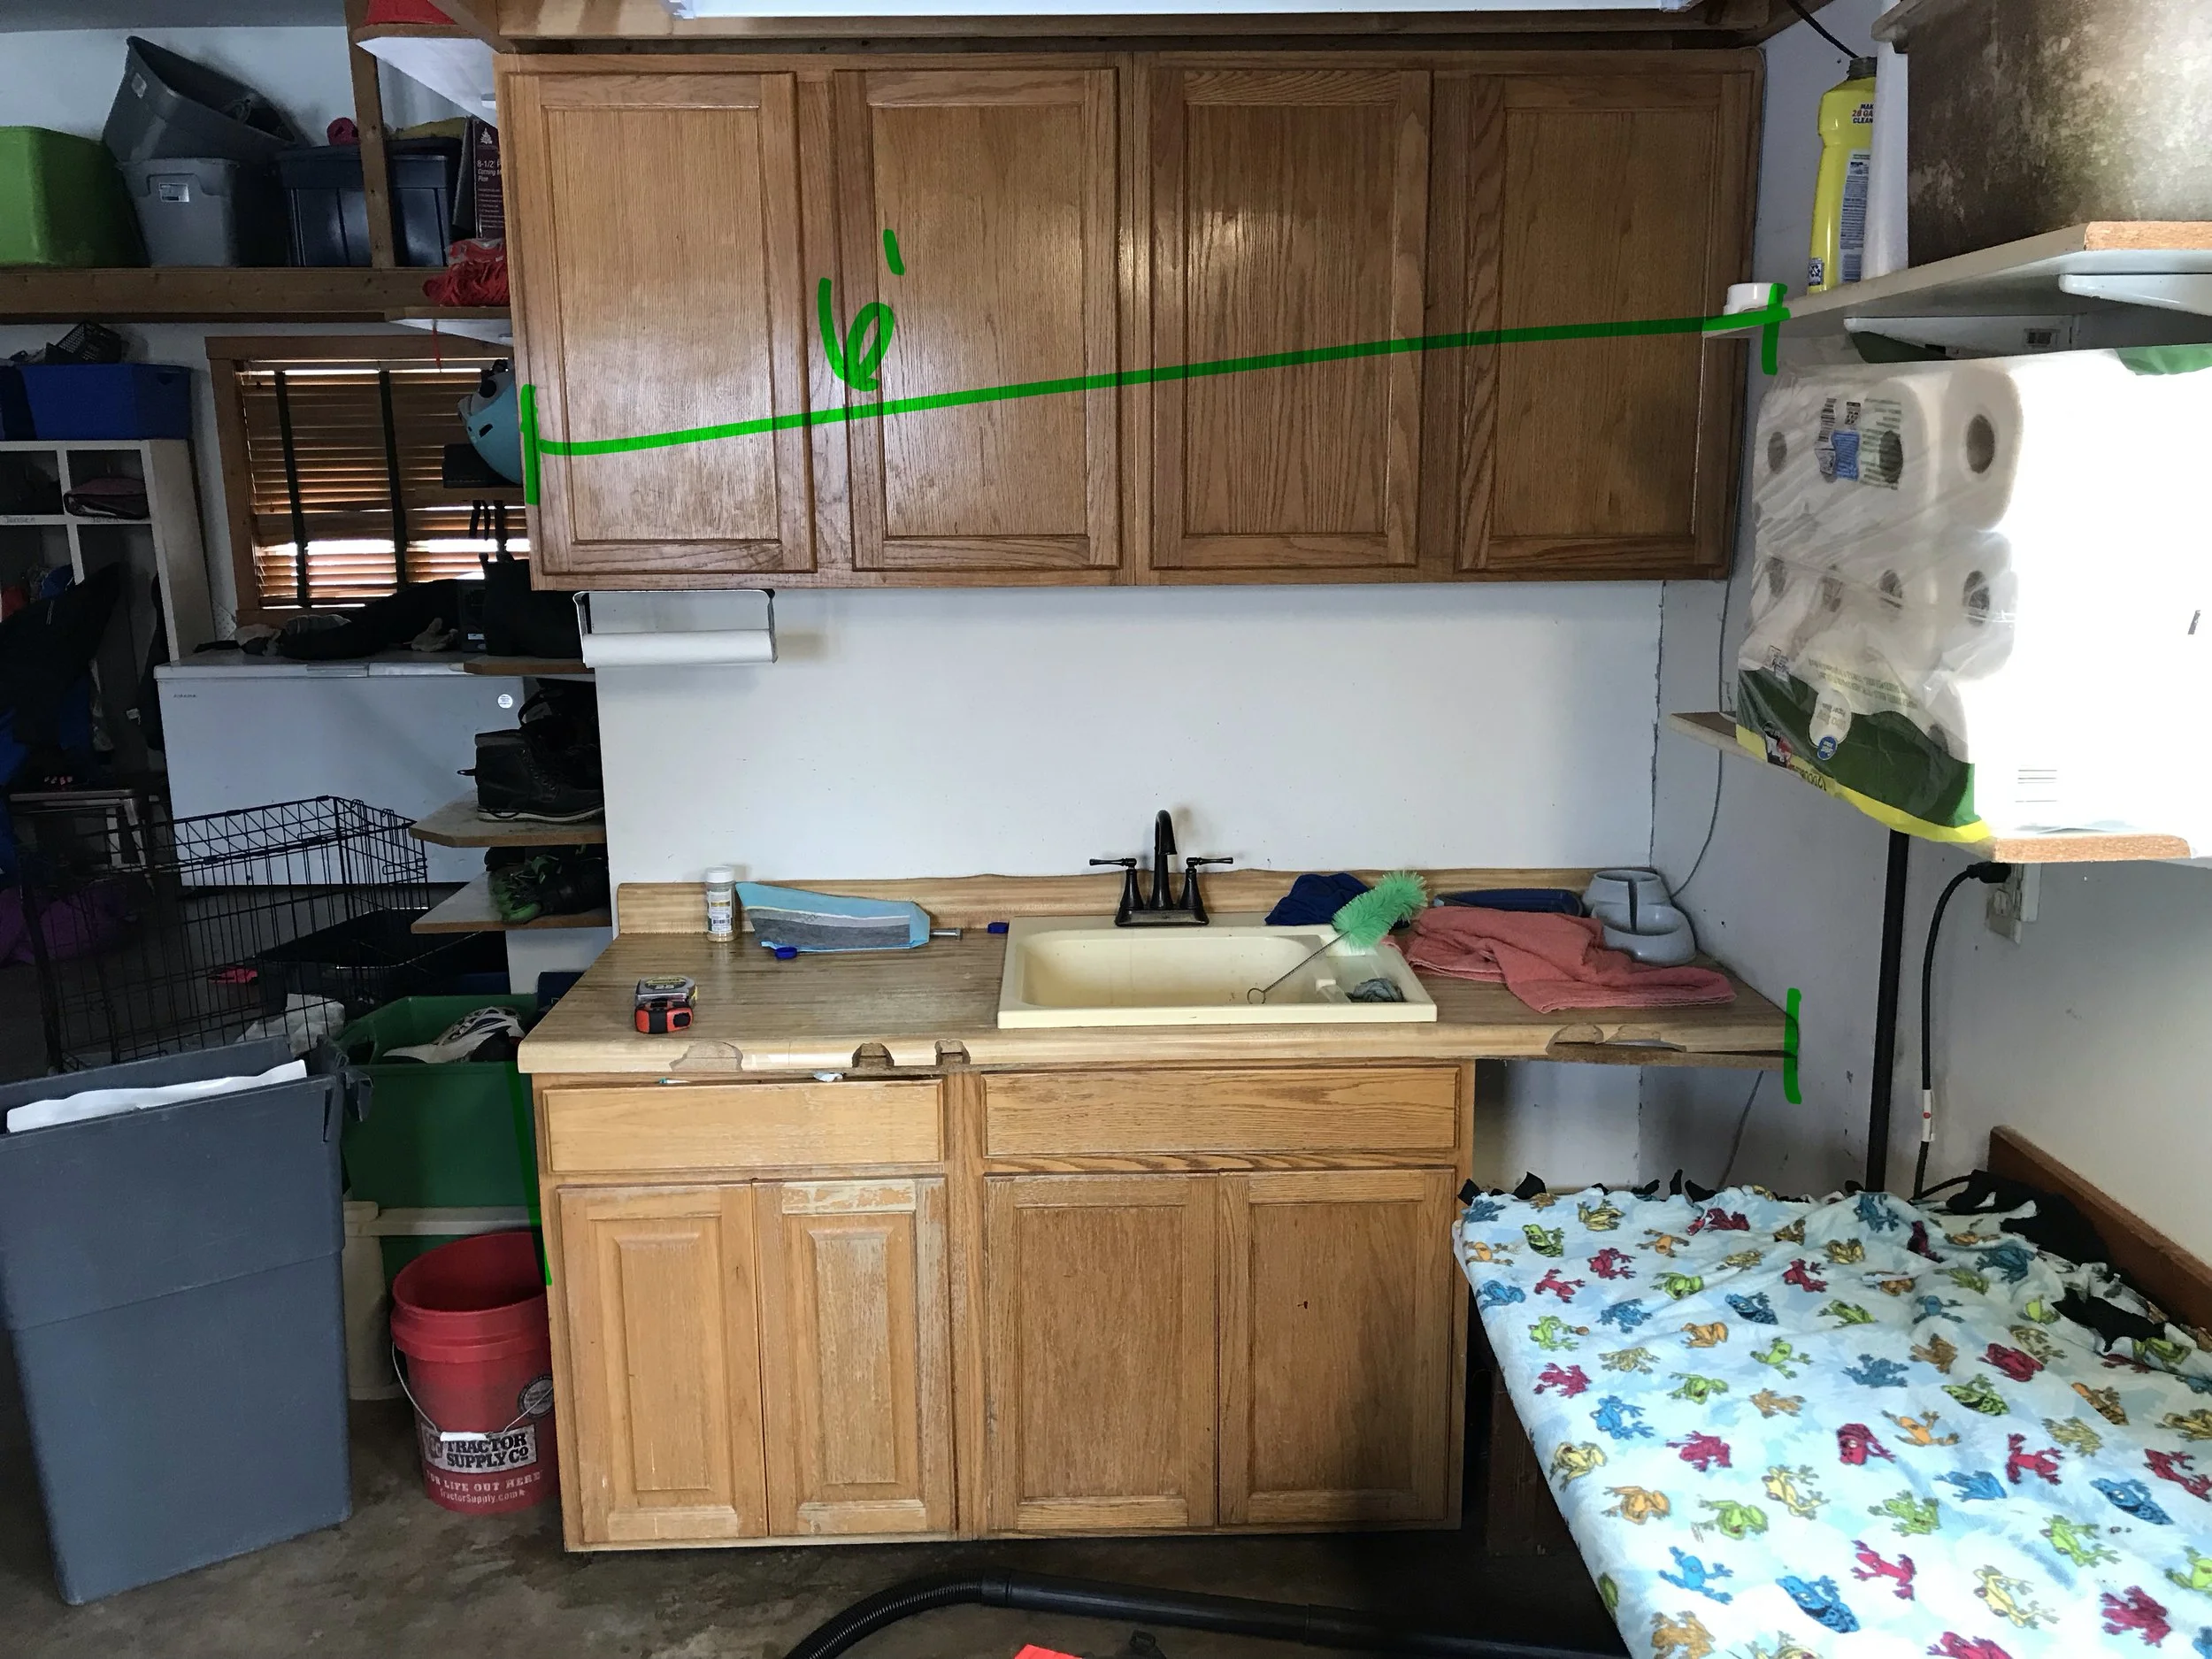
2. Existing Conditions
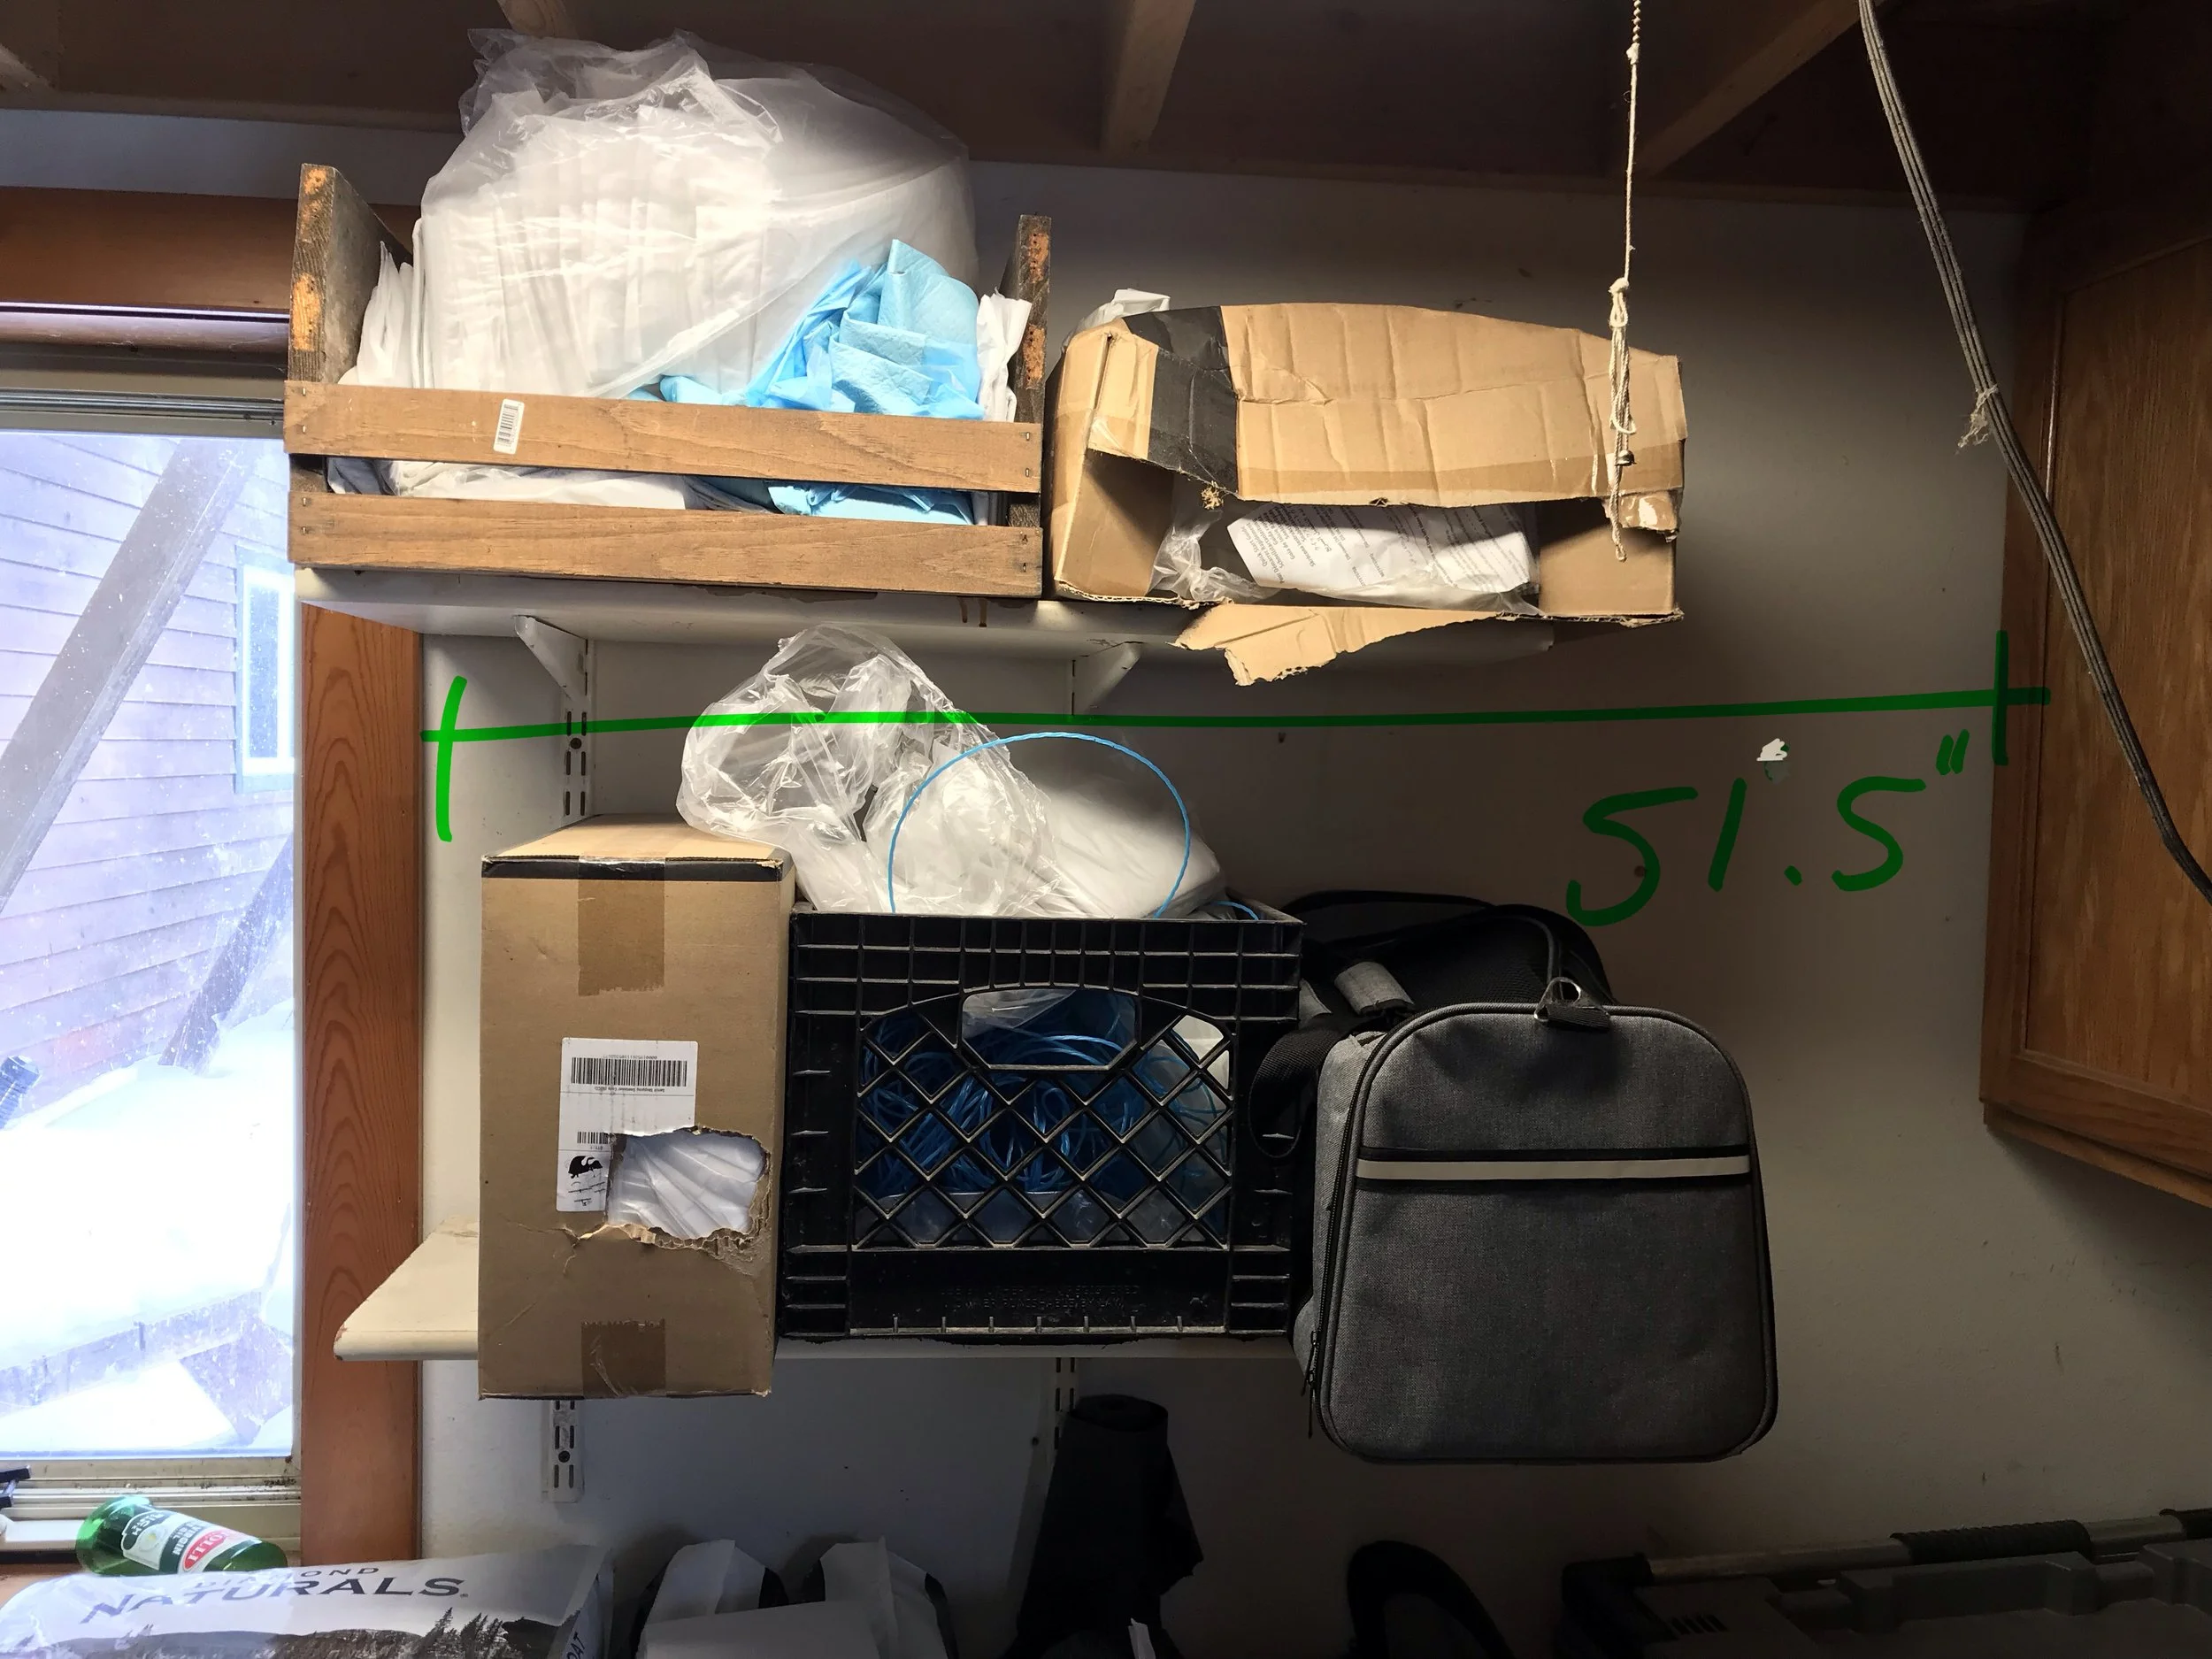
- Wall: Left wall of garage; clear span in this zone = 58".
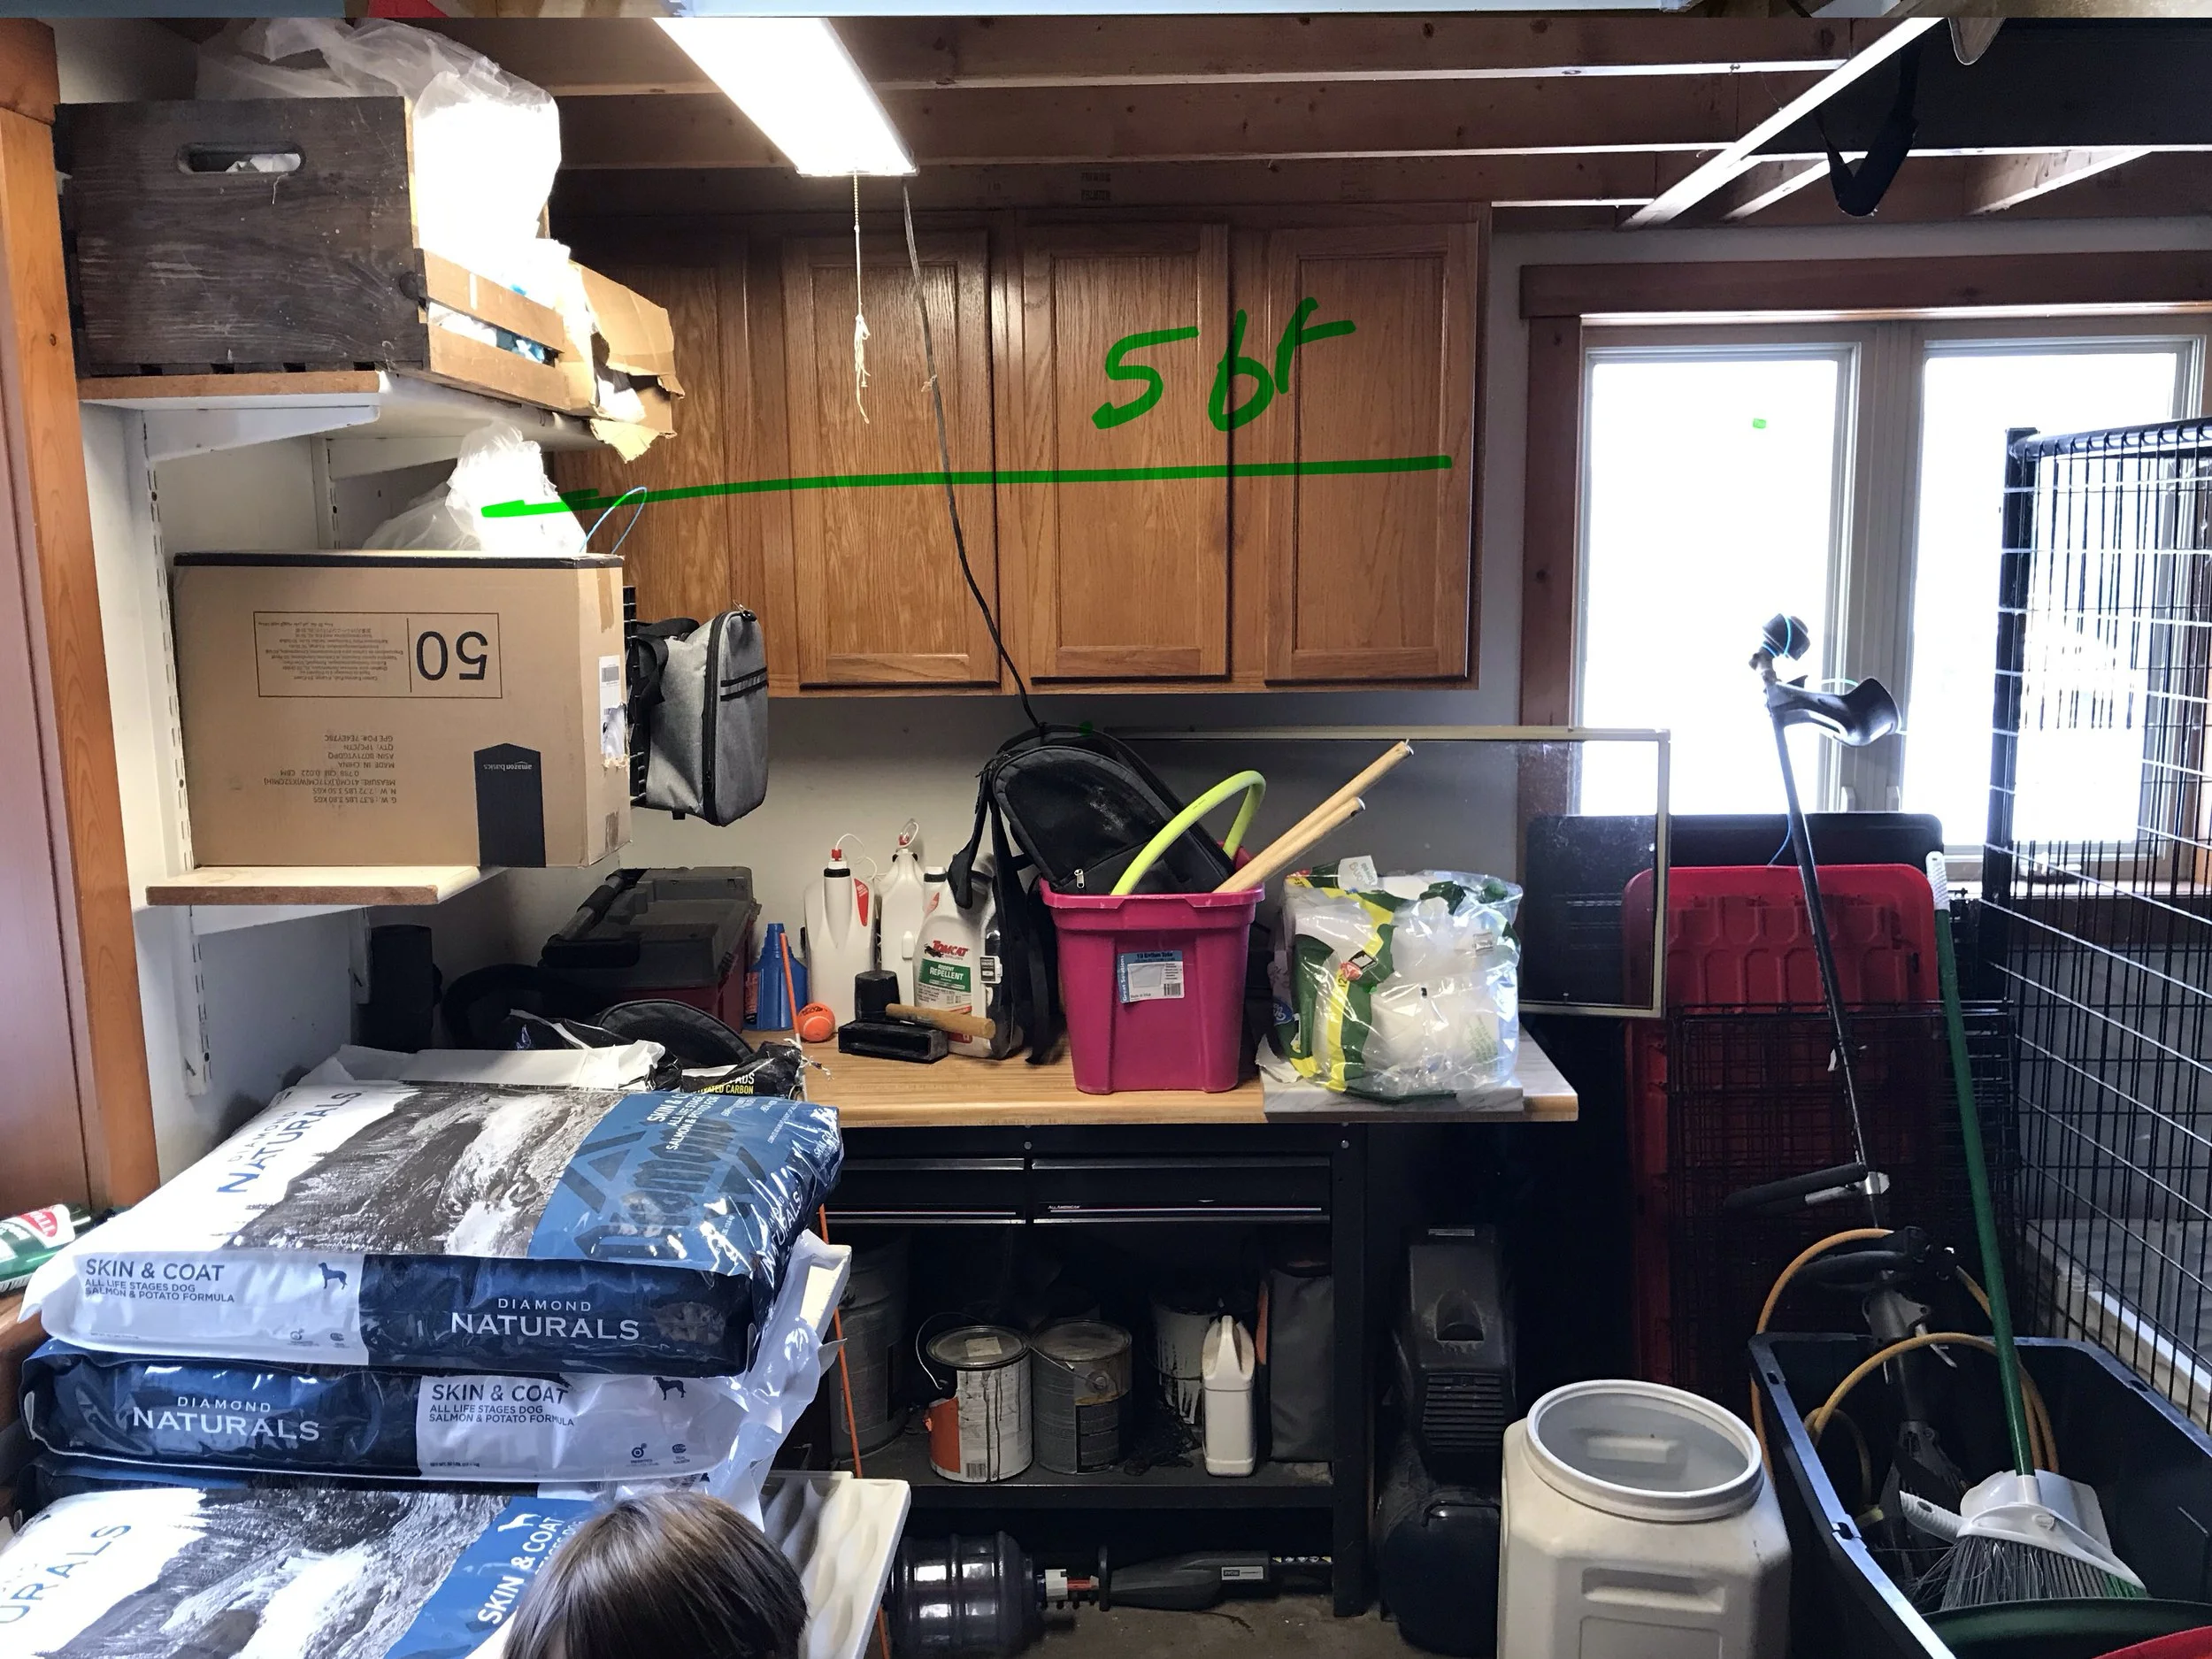
- Upper cabinets: Existing 6' (72") oak uppers above the counter. These stay in place.
- Countertop depth: Approx. 24" from wall to front edge.
- Current base: ~36" sink base with small laundry sink (to be removed).
- Floor: Concrete slab; no change required.
- Plumbing: Hot/cold supplies and drain already in this wall; keep in same general location.
3. New Sink Specification
Install a large, deep stainless sink suitable for dog bathing and utility work. Must be compatible with a 36" sink base cabinet.
- Model: Delironexu 33" x 19" Drop-in Kitchen Sink, 16-gauge stainless, single bowl, top-mount (Home Depot SKU: DET3319).
- Overall size: 33" W x 19" D (drop-in).
- Bowl: Single, deep bowl; centered in cabinet.
- Mounting: Drop-in into new countertop with silicone seal.
- Use: Frequent puppy baths, washing large items, and general cleaning.
4. Base Cabinet Layout – 58" Left Wall Zone
Fill the full 58" span with standard-depth kitchen/utility cabinets plus fillers. All base cabinets to be 34.5" tall (standard) and 24" deep.
- From left to right (standing facing the wall):
- 1) 4" filler panel scribed to the left wall for plumb/level issues and to keep doors from rubbing the wall.
- 2) 36" sink base cabinet centered under the new Delironexu sink.
– No drawer; full-height doors or false drawer front typical of sink bases.
– Interior left open for plumbing access. - 3) 18" drawer base cabinet on the right side.
– Prefer 3–4 drawers for grooming tools, shampoos, towels, etc. - Total width: 4" filler + 36" sink base + 18" drawer base = 58" overall.
- Continuous toe-kick and face-frame alignment across both bases and filler.
5. Countertop
- New countertop to run full 58" over the base cabinets.
- Standard depth (approx. 25" including overhang).
- Material: durable, water-resistant surface (laminate, solid surface, or similar) – owner is okay with utility-grade as long as it’s easy to clean and handles water.
- Cutout sized per Delironexu sink template; centered on 36" sink base.
6. Plumbing & Fixtures
- Re-use existing hot/cold supply and drain locations where practical.
- Install appropriate faucet (pull-down sprayer preferred for rinsing dogs), soap dispenser, and new drain/strainer per sink specs.
- Ensure p-trap and supply lines are fully accessible inside the 36" sink base.
7. Finish & Hardware
- Cabinets can be unfinished or prefinished stock; prioritize durability over style.
- Finish color to coordinate reasonably with existing oak uppers (exact match not required; this is a working space).
- Basic, sturdy pulls/knobs; nothing delicate.
8. Goals / Success Criteria
- Large, deep, easy-to-clean sink that comfortably fits Stokeshire puppies.
- Maximum functional storage in the 58" zone using standard cabinet sizes.
- All work plumb, level, and scribed tight to walls so it looks “built-in.”
- Ready for heavy daily use in a kennel / grooming environment.
Stokeshire Nursery Station — Ordering & Installation Steps
Scope
- Replace old oak base/upper cabinets & laminate top.
- Install stainless steel worktop (sinkless) on steel base cabinets.
- Install a freestanding stainless utility sink adjacent to the counter.
- Add optional wall cabinet and under-cabinet LED task light.
- Seal & finish as a hygienic, hose-down friendly “wet zone”.
Products to Order
| Item | Model / Link | Qty | Notes |
|---|---|---|---|
| Freestanding Utility Sink (Stainless) Primary | Transolid 36 in. x 22 in. x 34 in. Stainless Apron-Front Freestanding Laundry/Utility Sink w/ Wash Stand — HD #316751415 (TFH-3622-SS) | 1 | Place right of base cabinets, tie into existing hot/cold + drain. Verify trap height. |
| Stainless Worktop (56″ W × 24″ D) Counter | NewAge Products Pro 3.0 Stainless Worktop — HD #204858344 (36756) | 1 | Sits on base cabinets; sink is separate (freestanding). |
| Steel Base Cabinets (Black) Support | Husky Regular Duty Welded 24-Gauge Steel 1-Drawer 2-Door Base Cabinet (24″ W × 33″ H × 16″ D) — HD #312050925 (G2401B-US) | 2 | Depth is 16″. Add ledger/cleat & rear legs or substitute deeper bases (≥24″) if preferred. Two units = 48″ under a 56″ top (4″–8″ overhangs OK with cleat). |
| Optional Wall Cabinet(s) | Husky wall cabinet 24–36″ (match finish). Choose size to clear light and window. | 1–2 | For towels & grooming supplies. Add soft-close where available. |
| Under-Cabinet LED Task Light | 24–36″ LED bar, 4000K neutral. (Home Depot brand or Commercial Electric) | 1 | Bright, shadow-free lighting for grooming/photos. |
| Backsplash (Stainless) | 4″–6″ stainless upstand (sheet metal shop or SS backsplash kit) | 1 | Run full length behind worktop & sink edge; caulk top & sides. |
| Plumbing Kit | 1-1/2″ P-trap kit, supply lines (hot/cold), shutoff valves if needed | 1 set | Include plumber’s putty, Teflon tape, escutcheons, anchors. |
| Sealants & Hardware | 100% silicone (clear), construction screws (#10 × 2.5″), Tapcons if masonry | as req. | Silicone all wall seams; use SS screws on visible brackets. |
If you’d prefer a single-vendor turnkey, Home Depot can also coordinate cabinet design via Custom Garage Storage Installation.
Measurements to Capture On-Site (Before Ordering)
Step-by-Step for Chad
-
1Demo & PrepRemove old base/uppers and laminate top. Patch wall gouges. Snap chalk line at 36″ finished height. Locate & mark studs every 16″ OC.
-
2Dry-Fit LayoutSet two Husky bases side-by-side. Because cabinet depth is 16″, install a continuous 2×3 ledger on studs at 34″ height to support the 24″-deep worktop. Add rear adjustable feet or blocks under the overhang where needed.
-
3Secure Base CabinetsShim level front-to-back and side-to-side. Anchor through factory holes to studs. Join cabinets together with bolts through side flanges.
-
4Install Stainless WorktopSet on cabinets + rear ledger. Fasten from inside the cabinets into the underside rails (avoid piercing SS skin). Leave 1/8″ expansion behind backsplash zone; silicone joint after backsplash goes in.
-
5Backsplash & SealingMount 4″–6″ stainless upstand to studs with SS screws. Run continuous bead of clear 100% silicone at wall-top, vertical ends, and sink return.
-
6Freestanding Sink Setup (Transolid TFH-3622-SS)Place to right of counter. Level feet. Connect hot/cold supplies with braided lines; install P-trap to existing drain height (use extension if required). Test for leaks. Silicone perimeter where it meets wall.
-
7Upper Storage & LightingInstall wall cabinet(s) centered over counter, 18″–21″ above worktop. Add 24–36″ LED bar underside; plug into nearby GFCI or hardwire per code.
-
8Finish & QADeburr edges, remove film, clean with SS cleaner (non-chlorinated). Verify all seams are sealed, doors/drawers aligned, and counter is within ±1/16″ level across span.
Quick Order Links
Field Notes
- Prefer brushed (#4) stainless for scratch-hiding and cleanup.
- If deeper base cabinets (≥24″) are available in-stock, use them instead of the 16″ depth to eliminate the ledger detail.
- Add rubber anti-fatigue mat in front of sink/worktop.
- Keep bleach/chlorine off stainless; use pet-safe disinfectant compatible with SS.
East Wall Waterproof & Washable Zone
This section details the additional waterproofing and hygiene solution required along the east wall of the garage. The goal is to create a sealed, hose-down friendly, fully washable surface that ties into the new stainless workspace area and improves overall cleanliness for the Stokeshire Nursery environment.
Design Intent
- Surface must resist water, detergents, and light chemical cleaners (non-corrosive).
- Should integrate seamlessly with existing wall framing and outlet positions.
- Capable of full spray-down or mop cleaning without wall damage or moisture absorption.
- Match or complement stainless-steel worktop finish where possible for cohesive visual style.
Recommended Materials
| Material | Spec / Notes |
|---|---|
| FRP Wall Panels | White, smooth or pebbled fiberglass-reinforced panels (4’×8’ or 4’×10’) with vinyl or aluminum trim strips; install with FRP adhesive and seal all seams with silicone. |
| Stainless Steel Wall Cladding | 18–22 gauge brushed finish panels, 48″ height splash zone, screwed into studs with silicone-backed washers. Ideal behind sink and grooming zones. |
| Epoxy or Polyurea Floor Cove | Extend floor coating 4–6″ up wall base to form continuous waterproof transition. |
| Sealants | 100% silicone or polyurethane joint sealant rated for wet applications (clear or color-matched). |
Installation Notes for Chad
-
1Prep — Remove any damaged drywall or painted surface along east wall (approx. 36–48″ height). Clean and dry studs. Ensure outlets are GFCI-rated and positioned above 48″ if possible.
-
2Install FRP or SS Panels — Start from floor cove upward, overlapping joints with H-trim or sealed seams. Anchor mechanically where adhesive is insufficient.
-
3Seal Joints & Edges — Apply continuous silicone bead along vertical seams, outlets, and wall-to-counter junctions. Ensure a tight seal at floor cove.
-
4Lighting & Fixtures — Use waterproof LED fixtures (IP65+ rating). Avoid open fluorescent tubes; replace with sealed LED vapor-tight housing.
-
5Final Inspection — Confirm that the surface is smooth, washable, and water-resistant. Perform a light spray test to ensure all seams are sealed.
Optional Upgrades
- Stainless floating shelf system for grooming products.
- Quick-connect wall hose bib and retractable sprayer line.
- Moisture-resistant baseboard LED accent strip for night visibility.
All east wall installations should match Stokeshire’s “wash-down safe” standards — similar to veterinary or grooming facilities — with no exposed wood, porous seams, or absorbent materials.